Starting Brugmansia Seeds
The first time I planted brugmansia seeds, I did what I always do. I planted ten seeds in a single pot. I didn’t soak the seeds. I didn’t peel the seeds. I kept it damp. The seeds sprouted within a few weeks. Out of 70 seeds, I ended up with ten plants. Three of those grew up to be beautiful plants worthy of being registered. These days I do things a little differently. My germination rates have improved – a lot!
What you’ll need to get started:

The Seeds.
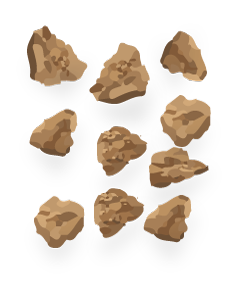
Brugmansia seeds are irregularly shaped and corky. They vary in size. Soaking seeds in a solution of 1 cup water and 1 tbsp. of hydrogen peroxide is recommended. This also helps if you plan to peel the cork from the seeds. We do not peel seeds.

The Pot.
If you’re starting a small pack of seeds, use a small 3-5″ plastic nursery pot. Make sure your pot is sterile. Wash with soapy water. Be sure to remove all debris. Rinse. Soak in a 25% bleach/water solution for at least 10 minutes. Air dry your pot.

The Medium.
Considering that seed starting mix only costs a few dollars per bag and you’re about to invest a year or more of your life in raising these little guys, start them out right. Most seed starting mixes are perfect for starting Brugmansia seeds.
 If you’re using a small nursery pot to start a few seeds, you’ll also need a plastic bag and a rubber band to create a humid environment for your seeds.
If you’re starting your seeds in a flat, a plastic humidity dome is nice. Even the plastic containers from the produce department or deli will work. Be sure to cut small drainage holes in the bottoms of your containers.
What you choose to sprout your seeds in doesn’t matter. All that really matters is that you have excellent drainage, plenty of room for the sprouts to emerge, humidity and warmth. Repurposing materials that might otherwise end up as trash, is always a great idea and saves money.
It is important that your growing container is sterile.
 Soaking Your Seeds.
If your seeds are very fresh, you won’t have to soak them or peel them.
When I order seeds, I like to soak them seeds for at least 24 hours in a 1 cup of water with a teaspoon of soluble kelp and a tablespoon of hydrogen peroxide.
You may choose to peel your seeds or partially peel your seeds. I do not peel my seeds. I have peeled my seeds in the past. I don’t enjoy peeling seeds. I would rather do just about anything else other than peel brugmansia seeds.
Planting Your Seeds.
Fill the sterile pot with your seed starting mix about 3/4 full. Spread the seeds evenly on top of the medium.
I like to cover mine with about 1/4 inch of vermiculite. You can also use some of your seed starting mix.
As with any seeds, you’ll keep the soil slightly moist until the seeds sprout. You can do this by checking the moisture daily. Check with your fingers – not your eyes. Your eyes will fool you. If the medium is damp – don’t water. If it is starting to feel less damp, water it. I like to use a small watering can so I don’t dislodge the vermiculite covering the seeds. Don’t let your medium dry out. You can use plastic bag to cover the seeds until they start to sprout, but be sure to remove the bag once the sprouts emerge from the soil.
If you’re starting seeds in winter, you may want to use a heat mat. Seeds need warmth to germinate. Some heat mats can get too hot. If yours dries your medium out too quickly, you might try turning it on only at night.
Once the seeds germinate, some of them might still have the cork attached, trapping the seed leaves. Mist the corky seed covering to keep it moist. The seedling will eventually free itself. Keep growing the seeds until you see “true leaves.”
Transplanting Your Seedlings.
Once your seedlings grow their first true set of leaves, you can transplant them into an individual container. True leaves will look more like brugmansia leaves. Seed leaves are quite different from true leaves.
Your individual container should be sterile. Fill with a light potting mix. Make a small hole about an inch or deep in the mix with a divot before pulling your seedlings.
To separate your seedlings, be careful not to touch the stem or roots. I use a plant tag or something similar to loosen the roots first. Pick the seedling (or seedlings if they are close together) up by the leaves and gently pull apart. Remember do not touch the stems or roots.
Place the seedling in the small hole. You can gently firm the soil around the roots. Use a small watering can to water your seedlings in. You can begin fertilizing in about a week.
Growing On.
Coming soon.
